Stamped Floral Wedding Invitations
The beginning of May means only one thing: we’re in the thick of wedding season. That’s both good and bad if you’re a soon-to-be-bride because, while it means that your wedding is only a few short months away, it also means that you only have a few short months to finish planning and tying up loose ends. And if we connect the dots here, that means it’s time to start thinking about invites (Hooray! We love invitations around here). Luckily for you, these DIY floral wedding invitations are both beautiful and easy to make. And they remind me of a classy garden wedding with a little upscale picnic action going on. Champagne + croquet, anyone?
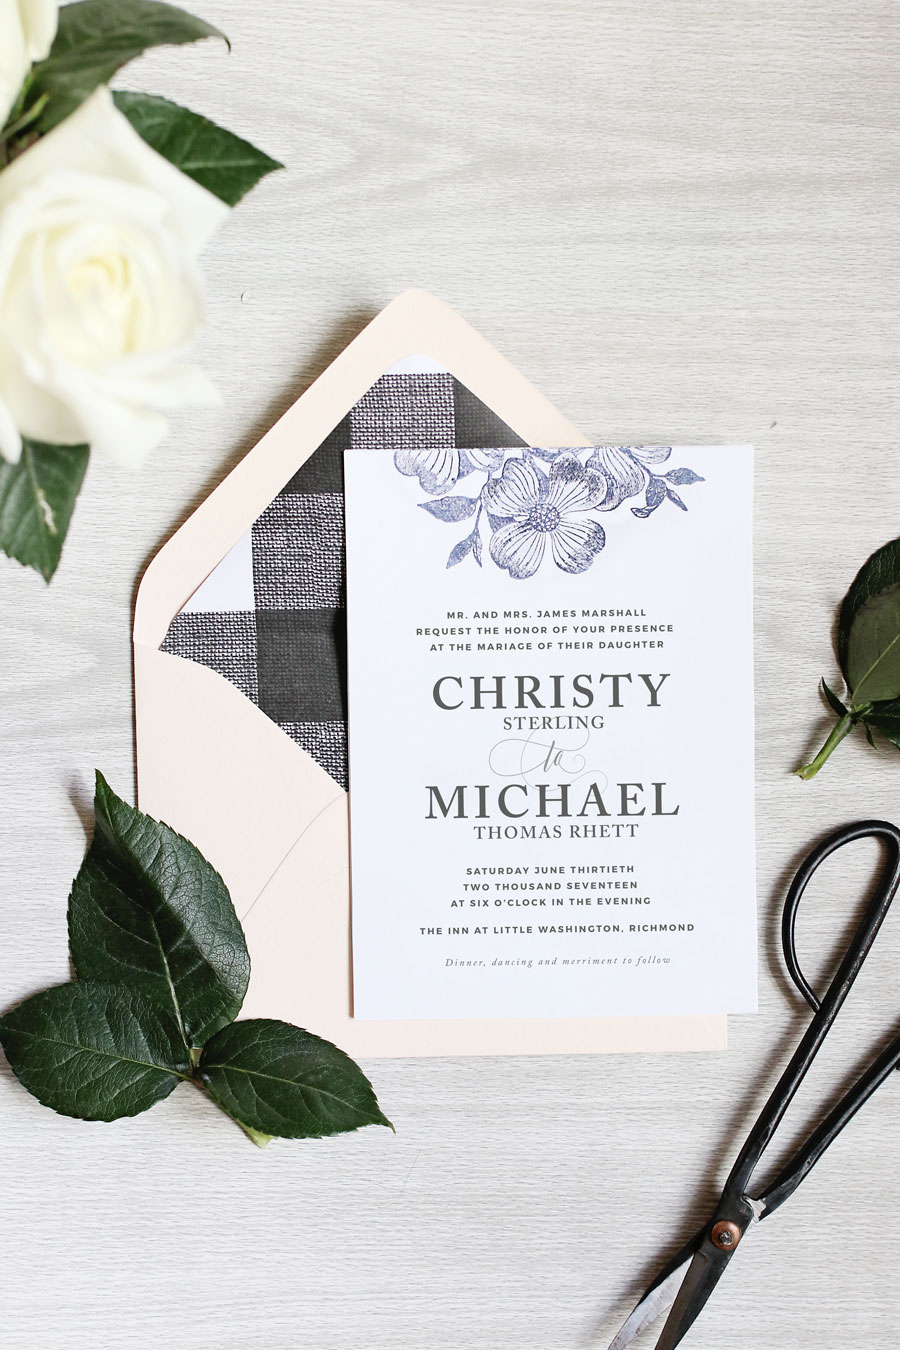
Oh, and while I’m waxing poetic about DIY invitations, would you believe me if I told you that you can make them for less than $65? Yep! Not only are they gorgeously understated and elegant but they cost less than your average trip to Target. Miracles abound.
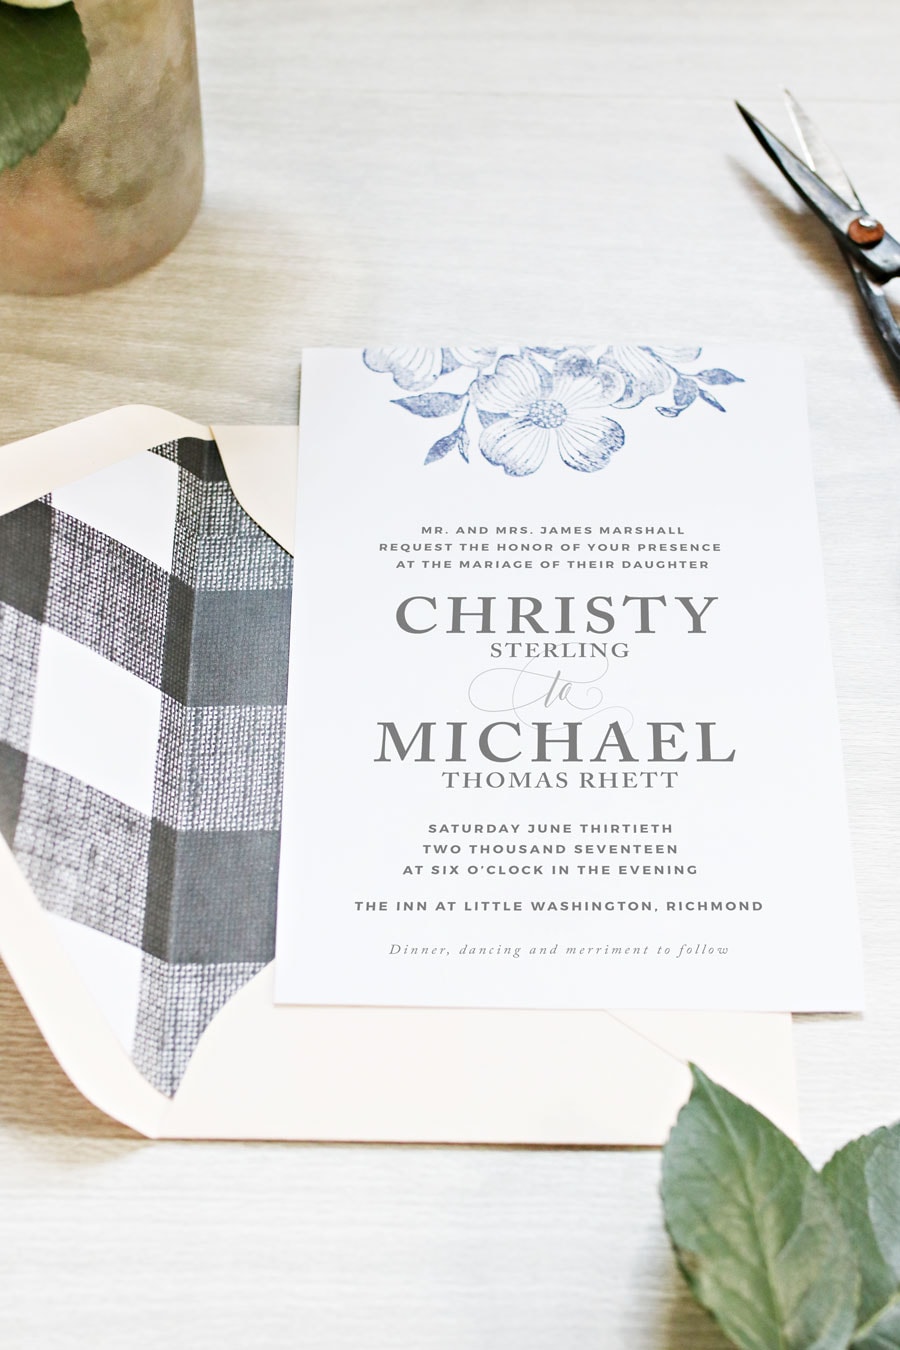
DIY STAMPED FLORAL WEDDING INVITATIONS
Supplies
80# cardstock in white or off-white
Envelopes
Invitation template that prints two-to-a-page
Floral stamp
Scissors
Ink pad in a color that complements your wedding
Fun paper to line your envelopes with (I got mine from Hobby Lobby but this is similar)
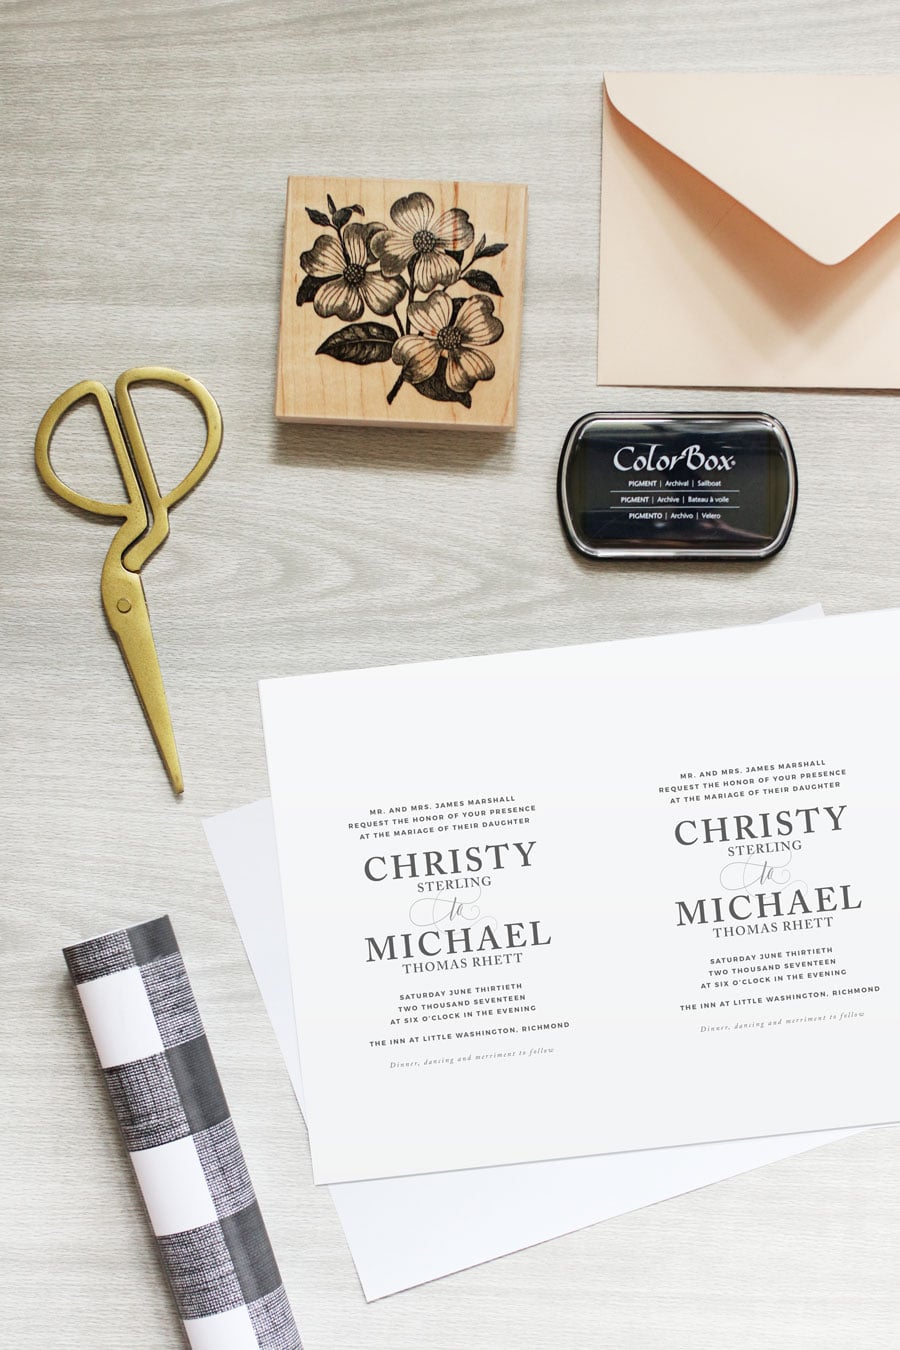
Start with a wedding invitation template or make your own printable invitations. When picking out a template, think in terms of a simple design with black text and lots of white space so you have room to play around with your floral motif. I used our Christy Template, which has since been retired, and just rearranged the text to make more room at the top. Fun fact: most wedding template (including ours) are 100% editable, meaning you can remove the illustrations and add/remove/edit entire text boxes if they don’t suit your needs. That makes them super easy to spruce up with paint, stamps and ribbon if you want.
Once you’ve selected your template, fill in your details and print your invitations. Let the ink dry thoroughly and hold off on trimming them down until after you’ve stamped them.
Take a loose piece of paper or a few sheets of clean newspaper and lay your invitations on top. Apply a generous layer of ink to your stamp, being sure to get every last nook and cranny so you don’t have any bare spots.
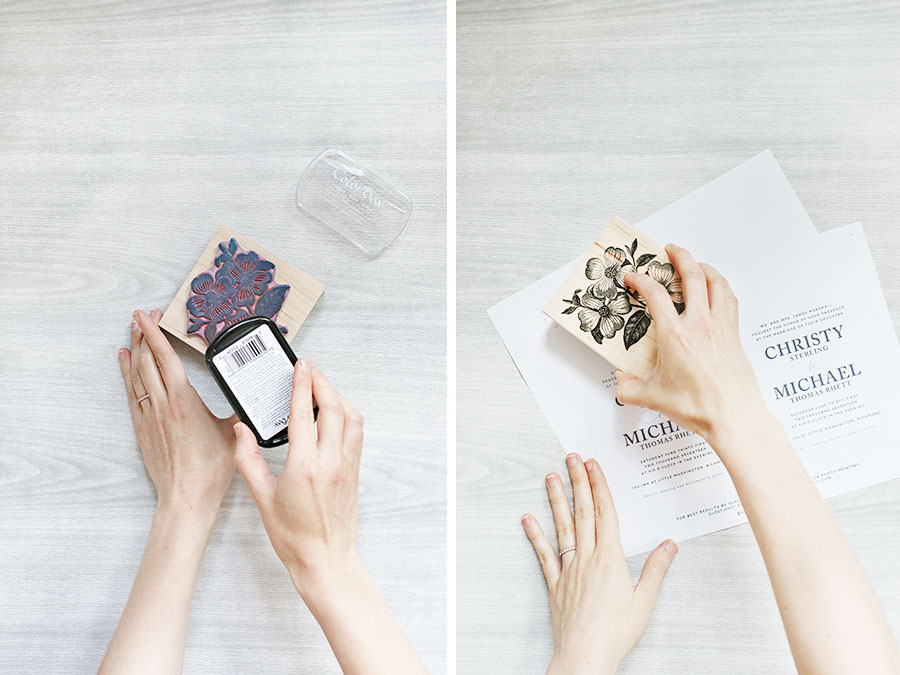
Lay the stamp face-down on your invitations. Firmly rub the back side of the stamp to make sure you don’t have any faded areas, then pick it up, apply more ink, and continue stamping until you have a created a pretty, balanced look. I like to rotate the stamp every so often to get a little variation in the floral pattern.
Then do the same for your RSVPs and any additional inserts you might need. If you’re feeling extra frisky, why not stamp the corner of your envelopes to tie everything together and create a playful first impression.
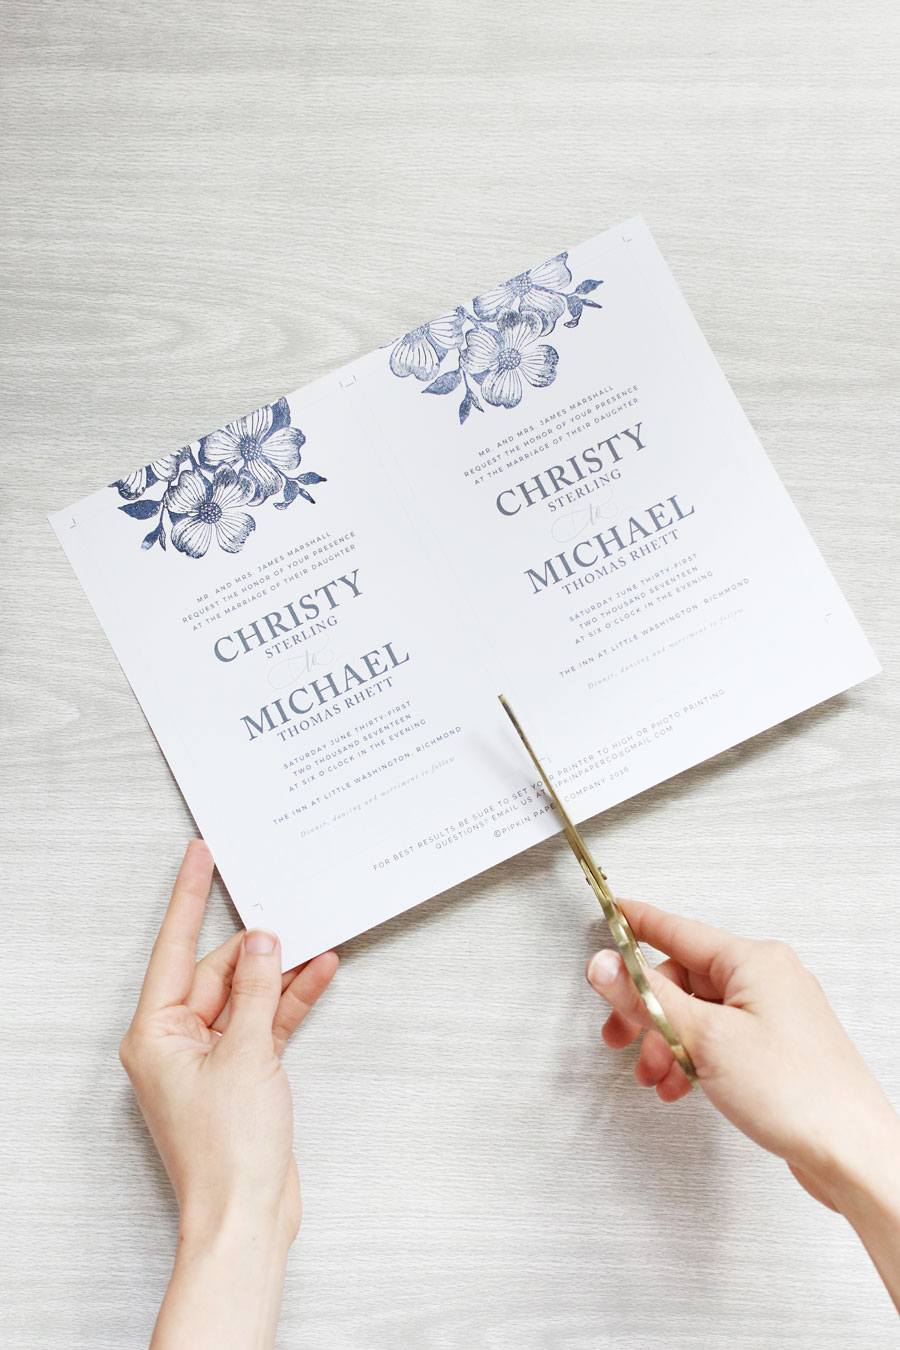
Don’t worry if the ink looks faded in some areas and darker in others. Their imperfect charm is part of what makes these invitations so beautiful. And trust me when I tell you that these look much darker and more vibrant in real life. Thanks to some less than optimal lighting, ours look a little washed out in photos.
Once your invitations have dried completely, trim them down using regular scissors or an X-acto knife.
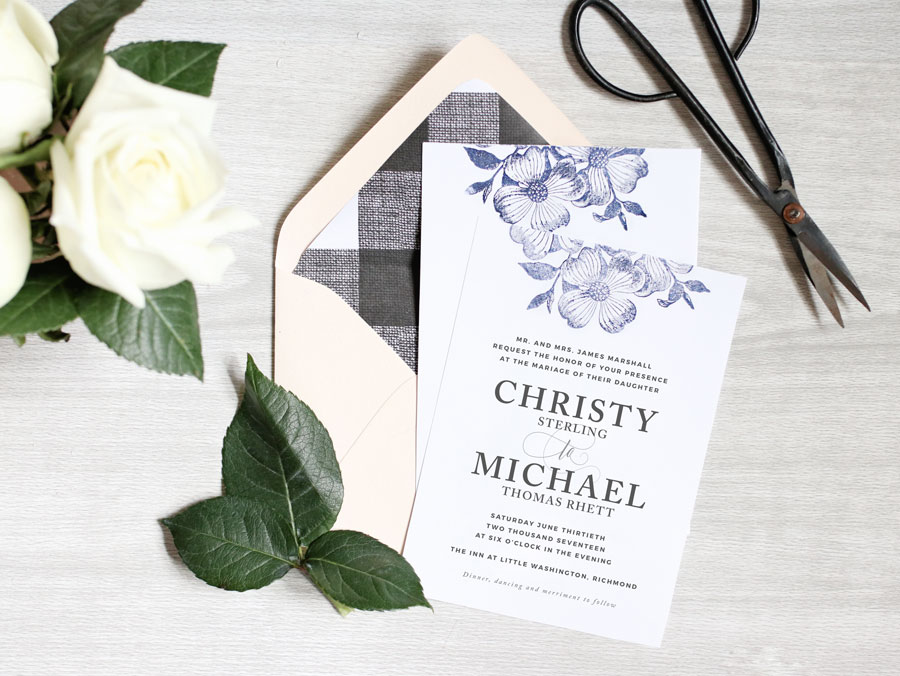
So how’s that for invites that don’t cost one month’s rent? One of my favorite things about these floral wedding invitations is that they’re classic and understated. While most floral invites can be a little loud or over-the-top, these are breezy and even a bit rustic, so you don’t have to worry about them screaming “girly”.
The information contained on this Website and the resources available for download through this website are for educational and informational purposes only. I am only sharing what worked for me, and as such, I cannot guarantee that any products or processes will give you the same results.




2 Comments
Leave your reply.