The Ultimate Wedding Planning Checklist
Planning your wedding is one of the more sweat-inducing (and if I’m being totally honest, stomach churning, terrifying, and holy-crap-is-this-over-yet) aspects of getting married. As a matter of fact, I recently learned that of all the things a couple goes through over the course of their relationship, aside from the death of a family member, the toughest are: having a child, planning a wedding, and buying a house. In that order.
So to put it another way, wedding planning is just slightly less painful than delivering a baby.

I think on some level we already knew this, especially since wedding planning and giving birth have so much in common—but now we just have the science to back it up. So for all you newly engaged ladies and gents out there who are stressing out about planning your wedding, this post is for you.
We’re going to be giving you a game plan that helps take some of the stress out of planning your big day and makes it just a little more fun.
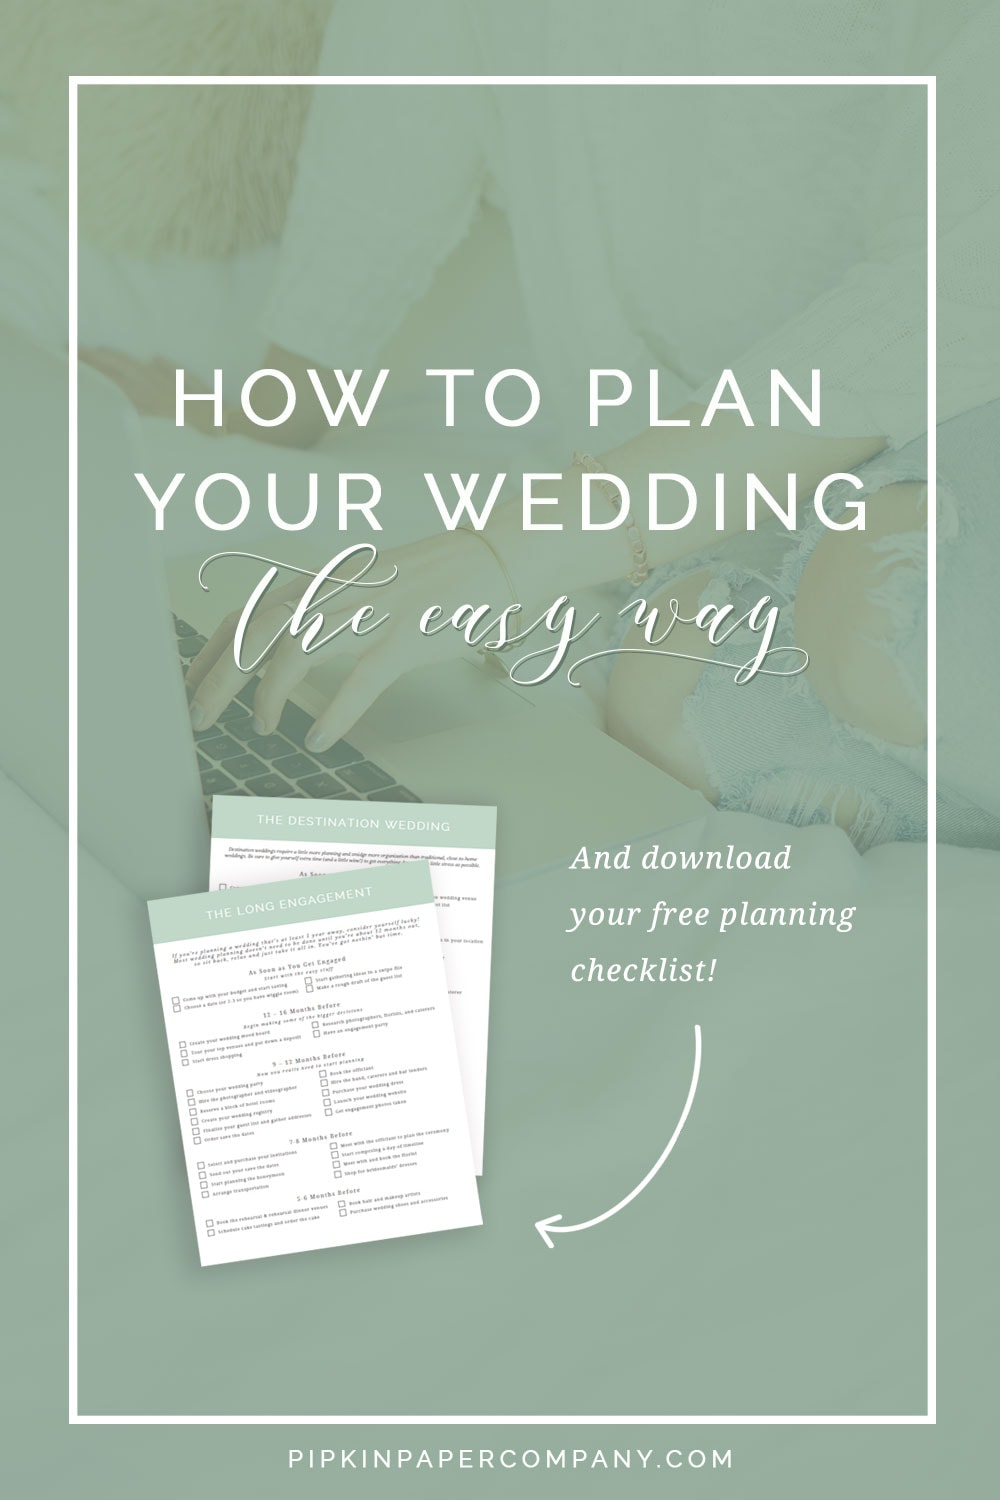
Now before we get started, I want to give you The Ultimate Wedding Planning Checklist to help you better implement some of what we talk about in this post. Because no two weddings are the same, I actually made a bunch of different checklists depending on the type of engagement/wedding you’re having. There’s a different checklist for short engagements, elopements, destination weddings and everything in between so just click the button below to grab your download and scroll to the page that’s meant for you. And did I mention it’s free?
Wedding Planning 101
No matter your time frame, planning a wedding can get hairy. Here’s how to best tackle your wedding planning to make it as pain free as possible.
1. Start with the Budget
While some sites say you should focus on the guest list first, I think you need to get a handle on your budget as early on in the process as possible. Now while I don’t expect you to completely cement your budget the second you get engaged, you do need to have a feel for your finances before you start making any decisions. If you haven’t already spoken to your parents about money yet, you’ll want to do that now. I know it can be scary, but it doesn’t have to be. Just go into it poised and with a plan and it shouldn’t be a big deal. Here’s what you need to do:
Get an idea for the kind of wedding you want
It’s helpful to have a strategy for talking to your parents about wedding finances before you enter the lion’s den. So prior to meeting with your folks, set aside some time to talk to your partner about the type of wedding you would like to have and decide how much the two of you can contribute. That way if your parents are willing to help out but don’t have a fixed amount of money already set aside for your wedding, you can have a ballpark figure for how much you might need.
Meet with your parents to discuss finances
There’s really no comfortable (read: un-awkward) way to ask your parents for money, so keep it short, sweet and as unassuming as possible. Say something like, “Charles and I have started talking about the budget, and we were wondering if you were planning, or would be willing, to contribute.” That way the ball is your parents’ court as far as for how (and how much) they feel comfortable contributing.
While you want to keep the conversation light, just make sure you walk away with specifics on how and how much they will be chipping in. Will you be getting a check up front? Would your parents rather pay for specific expenses (like the dress and the reception venue)? Etc.
Talk to your partner’s parents
This one is slightly trickier, and for that reason it’s up to you if you really want to do it at all. Traditionally the bride’s parents foot the bill for the wedding while the groom’s parents pay for the rehearsal dinner. But tradition has changed so much in recent years and this isn’t always the case anymore. That’s why it’s important for you to broach the topic with your fiancé’s parents as well.
Again, be as nice and unassuming as possible, and say something along the lines of, “Lindsay and I have started planning the wedding, and while we in no way expect you to contribute, we were wondering if you were planning to contribute to the rehearsal dinner.” If you’re not having a rehearsal dinner, fill in the blank with some other expense the groom’s parents traditionally pay for like alcohol, boutonnieres or marriage license fees.
Re-evaluate what you and your partner can contribute
Okay, so now that you have an idea for what you might be getting from your parents, go back over your dream wedding budget from step 1. Does this still make sense? Do you need to make any adjustments? Would it just make more sense to elope? And tweak it until you get to a number that feels comfortable.
2. Make your Guest List
Once you have an idea as to how much money you have to work with, you can start creating your dream guest list. So you don’t leave anyone out, I think it’s best to create a list of everyone you can possibly think of and narrow it down from there. Start with family and close friends, then move on to more distant friends, neighbors, coworkers, people from your church, old roommates, etc. Once you have your list made, you can start limiting it based on your budget.
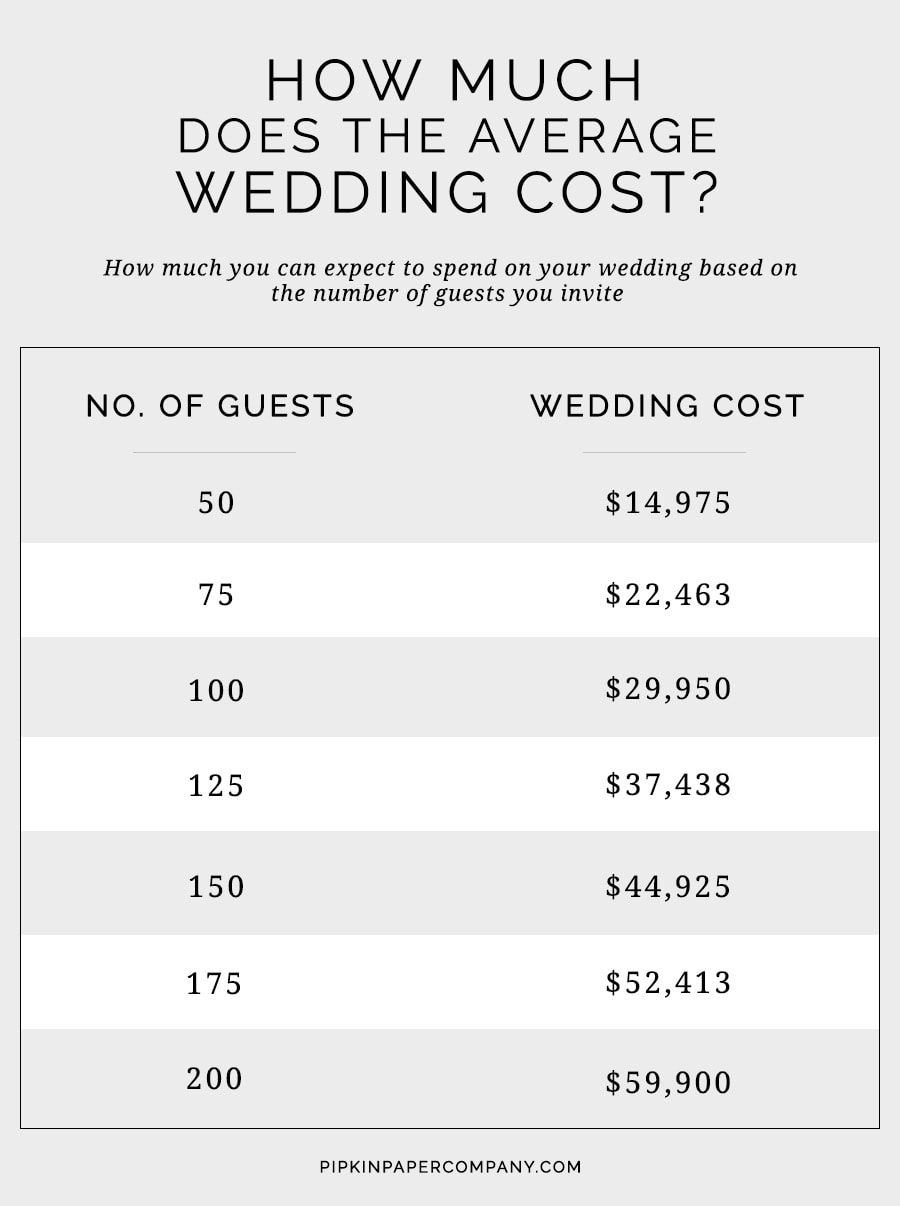
Here are some stats from The Knot that’ll give you an idea of the average wedding cost based on the size of the guest list. While this isn’t definitive by any means, it will give you something to work with when it comes to whittling down your list.

So, if your budget is $25,000 and you want the dream wedding, start by limiting your guest list to 75 – 100 people. You can always add more people later if there’s wiggle room in the budget.
3. Come up with your wedding vibe
Wait, what? You need a plan for what you want your big day to look and feel like. This little bit of pre-planning doesn’t get nearly enough credit, but it will save you tons of stress in the long run.
Gather inspiration
Step one for designing a wedding involves simply gathering ideas. I like to use Pinterest for this, but you can cut pictures from magazines, save ideas in Evernote or download pictures straight to your computer. If you’re a Pinterest geek like I am, create a secret board to collect images that perfectly describe your ideal wedding. But don’t just pin anything and everything–be selective. You know the feeling when you see an image and you heart skips a beat? Pin that!
Create a mood board
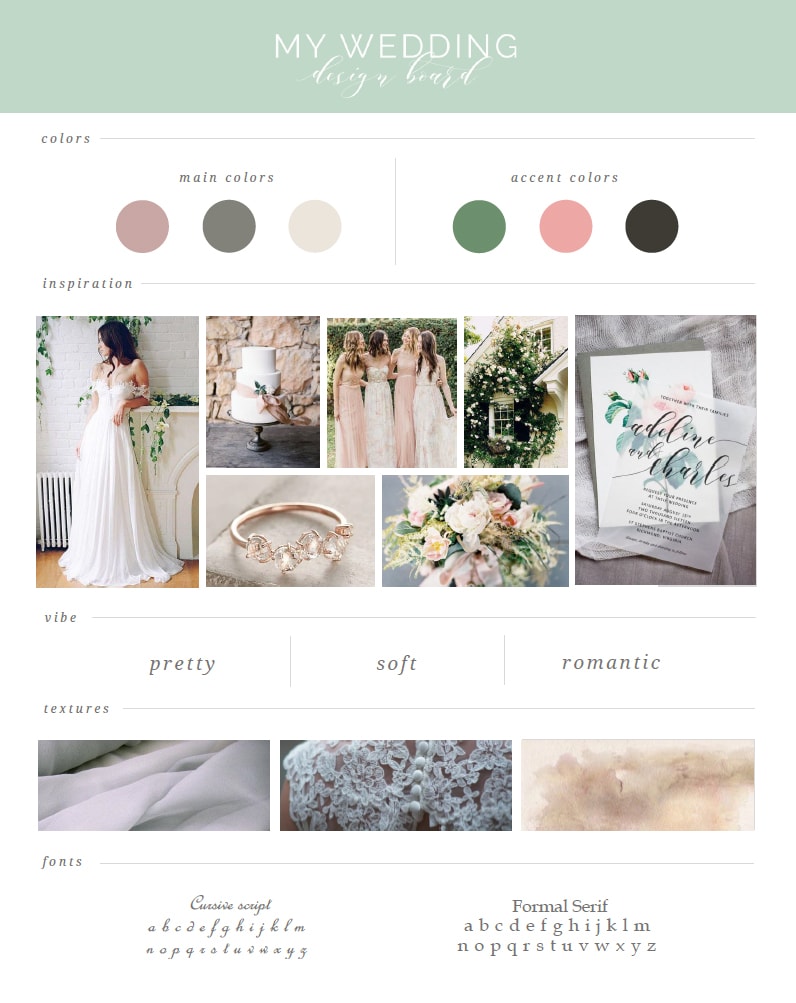
Pinterest is a great place to collect ideas, but it isn’t exactly a mood board. You need to narrow down your ideas to a cohesive look and feel that fits together. Save your favorite images to your computer and compile them in a single document that you can print out and carry in your wallet. Use your inspiration images to help select 2-3 colors overall colors, plus 2-3 accent colors. Then move on to textures (like lace, linen, or satin), and finally finish up with fonts.
This will give you an overall vibe for your day. To give you an idea of what I’m talking about, here’s one I made for a custom invitation suite I recently designed.

Name that vibe
I think it’s also important to pick a few words that encapsulate the overall feeling of your mood board. This could be elegant, soft, rustic, natural, modern, whatever. Just pick a couple of words that you can use when trying to describe the look you’re going for to the girl at your dress fitting.
4. Make the big decisions.
Now that you have a budget, guest list and a look and feel for your wedding, you can start by committing to a few of the bigger decisions. We classify the big decisions as things like the date, venue, dress, flowers, photographer and caterers, but “big” might mean something different to you so use your gut (don’t worry, we cover all this in the checklist).
But whatever you start with first, hopefully you’ve printed out your mood board and put it in your wallet, yes? Good. Now when you’re out touring venues or trying on dresses, you can refer to your mood board before making a decision. Ask yourself, does this go with my color scheme? Does this feel bright and pretty like my mood board? Does this say mid-century elegance like I want it to?
Simply bounce the options against your vibe and colors, and choose what fits. Toss what doesn’t.
Do this for all the big decisions like…… It should be easy.
5. Then fill in with the small decisions
You’re almost done, but there are just a few things left to do before you can kick your feet up and pour yourself a glass of celebratory wine. Since we can’t cover every possible task here, download this free wedding planning checklist and start checking off any decisions you have left. Hopefully you’ve already made some of the big ones, so all you have left are the smaller things like table linens and seating assignments, but whatever it is, you’ll find it in the checklist.
And since weddings are as varied as people, we have made several different checklists—one for all the different types of engagements. So download the checklist and scroll to the page that matches your wedding. After doing the first 4 tasks above, start bouncing remaining tasks off your mood board and crossing them off your list.
The information contained on this Website and the resources available for download through this website are for educational and informational purposes only. I am only sharing what worked for me, and as such, I cannot guarantee that any products or processes will give you the same results.


Leave a Reply
We don't like getting spam either. Your email is safe with us.